Easily import data into your web site by choosing "Imports" found under System Settings, then using one of these import sheets.
All data imports can be set to "Syncable" simply by toggling "Index" on any import and selecting the unique identifier. Contact support with questions!
Bulk Data Import Sheets
Please take note of the red and blue columns on the TEMPLATE - User Accounts import sheet. The red columns titled "Display Name," "Email," and "Password" indicate that the data in those columns is required. On the other hand, the blue columns titled "Groups," "Is Active?," "Super User?," "Impersonate," "Microsoft Oauth," and "Google Oauth" mean that the data in those columns is optional.
To create a new import, click the gear icon at top-right, and then choose Imports under System Settings in the left navigation.
- Click the green +Import button in the upper right-hand corner and select the type of import.
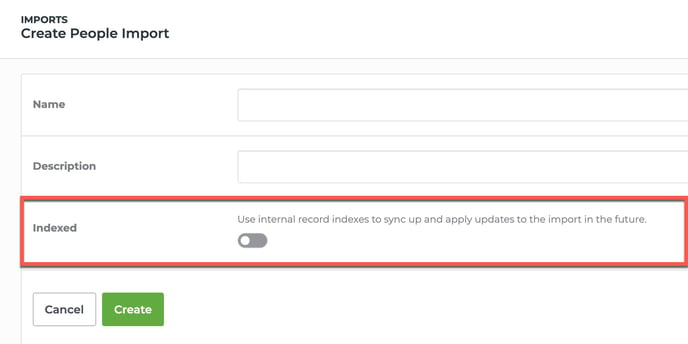
- Enter the Name and a short description of the import. If you would like to create an import that is syncable (i.e. you can update records later using a revised sheet,) toggle the Indexed selector (see below) and then click Create.
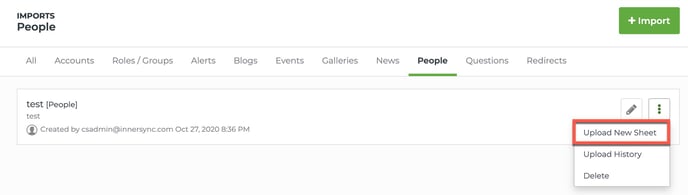
- Now click the elipsis (three vertical dots) icon to the right of the import you just created to upload your import sheet.
- What is a an indexed (syncable) import?
An indexed import allows you to create an import that can be refreshed with updated data in the future. Required is a unique identifier for each record. Typically, this is a numerical ID that is generated either from the system that generated the data file, or an ID that is applied to the file later. The important thing to understand is that the ID does not change from one import/refresh to the next. We rely on the ID being consistent so the records are properly updated with other data that may have changed. In the case where a unique ID is not available, the email address can be used (since email addresses don't often change). Using the email address is not ideal because there are rare cases when it could in fact change. If an email address changes, then, a new record would be created on the next import (vs updating the intended record).
Note: An existing import cannot be switched over to an indexed import. You will need to purge the previous import and then re-upload the sheet using the Indexed toggle. - How can I tell if an import is indexed?
You can tell if an import is indexed by when it is labeled Updatable. - How do I edit the name or description of an Import?
While on the Imports screen under Site Settings, click on the Pencil icon to the right of the appropriate import. This will bring up a window where you can edit the Name and the Description for the import. - How do I upload an import sheet?
After creating the import, navigate to the proper screen (Account, Role/Groups, Alerts, Blogs, Events, Galleries, News, People,, Questions, and Redirects) in Imports and click on the elipsis (three vertical dots) to the right of the import, and select Upload New Sheet from the options given.
Note: See the additional articles below for detailed instructions and tips on setting up the documents for each of the imports.
- How do I download an import sheet?
If you need to download an import sheet for any reason, navigate to the proper screen (Account, Role/Groups, Alerts, Blogs, Events, Galleries, News, People,, Questions, and Redirects) in Imports and click on the elipsis (three vertical dots) to the right of the import, and select Download Live Sheet from the options given. - How do I process an import?
After importing an import sheet click on the click on the elipsis (three vertical dots) to the right of the import, and select Process Import from the options given. On the following screen, click Test and if there are no issues, click Process.
If there are any problems with the import file, SchoolNow will tell you. If it successfully imports, you will be taken back to the import screen. - What are mappings?
By clicking on Mappings you tell SchoolNow what columns hold the proper import data. If you use the import sheets that we provide, these mappings should automatically line up. If they don't, simply interact with each of the pull-down menus to specify which column in your sheet should be used to pull that data into the proper column in SchoolNow (the field names at left). It's OK to leave fields blank, but remember, the department ID, title, and start date are required. Once done, click Save - What is the difference between Purge and Delete?
Selecting Purge under the options to the right of any Import file, (which only appears after an import has been processed,) will purge the data that has been uploaded from the current sheet. Choosing Delete will delete the Import file entirely.
Note: Please remember that once data is Purged or an Import is deleted, it cannot be retrieved. The data must be re-imported.
