The basic building block for any webpage. Allowing you to place text, images and more on a page.
How do I add this widget to a page?
- Click Edit Page
- Click either + Content or the Settings icon (down-facing arrow) which will be located to the right of Edit where you will need to select either Insert above or Insert below
- Choose the TEXT widget
- After you've created your content within, click the green Create button
- Your TEXT widget will show up on the page.
- Make sure to click either the Publish or the Save Draft option just as you would when you're editing pages.
- How and why would I want to see the source code of the TEXT widget?
To see the source code of the TEXT widget click on Source (located in the first row). One of the reasons you might want to view the source code is to place a snippet of code that you have received from third-party sources, an alternative option to the HTML source widget. Another reason you might want to view the source code is if there are elements on the page that is acting or looking odd, you could look at the source to see if there are any styles or formatting that has been applied to the elements. - How do I copy and paste elements in the TEXT widget?
Built into the TEXT widget are Cut, Copy and Paste tools (located in the first row). These allow you to cut, copy, and paste elements in the same TEXT widget. You can also use your browser's built-in cut, copy and paste functions too, which would allow you to copy and paste between windows. If you are copying elements from an external source, we recommend using the Paste as plain text tool. Keyboard shortcut: Cmd + Shift + V - How do I paste text in from Word or an external source?
Place your mouse and click where you would like the text to go and then click on the Paste as plain text tool (located on the top row, 5th button from the right). Paste your text into the window provided. This will clear any extraneous code that could be hidden. Keyboard shortcut: Cmd + Shift + V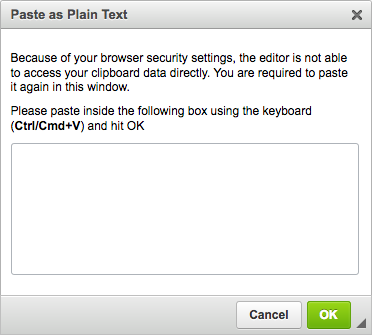
- How do I undo something that I just did?
You can undo the last thing you did by clicking on the Undo tool (located in the first row) You can undo everything back to the current save/update of the widget. If you accidentally undo something, you can click the Redo button (located in the first row) to redo it. Like the Undo tool, the Redo tool will only work while you are in the widget. Keyboard shortcut: Ctrl + Z - I need to find a word or phrase in the editor, how do I do this?
Using the Search tool (located in the first row) you can quickly find every instance of a word or phrase in a TEXT widget. If you need to replace every instance of a word or phrase in the widget, either click on the Replace tool (located in the first row, the tenth button from the left) or click on the 'Replace' tab while using the Search tool.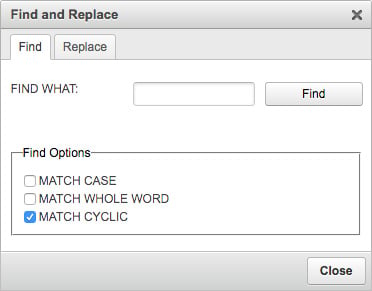
- How do I run a spell check?
If you would like to run a spell check while in a TEXT widget, click on the Check Spelling tool (located in the first row, the eleventh button from the left). Possible misspellings will be underlined in the window, when you are done running the spell checker click on Finish Checking. - How do I make the work area larger in the TEXT?
There are two ways to make the work area larger in the TEXT, the first is located in the first row of the toolbar. If you click on the Maximize button, the work area will fill up the window. To minimize the work area again, click on the same button which will now be labeled Minimize. The second way is by clicking on the down-facing arrow located in the bottom right-hand corner of the TEXT editor, with it you can click and drag the window larger. - Is there a way I can view the elements of a TEXT in blocks, making it easier to format/style?
If you are having problems with styling or formatting elements on the page such as having more or less elements taking on the new style or format, Blocks (located in the first row) might help. It outlines (example below) the different elements by paragraphs and formatting.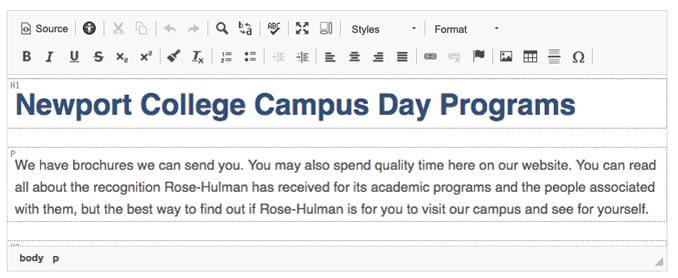
- How do I apply a style to specific bodies of text or content?
To apply a style such as colored text, a specific look for a table, etc., select the content and click on the Styles drop-down menu (located in the first row) and pick the appropriate style. - How do I make or change the format to headers?
To apply or change the format of the text, select the text that you would like to change. Go to the Format drop-down menu (located in the top row on the far right) and select the predetermined format (style) that you would like to apply.
- How do I bold, italicize, underline, strikethrough, sub, or superscript text?
To apply a style to text, select the text and click on the style you would like to apply (located in the second row.) Keyboard shortcuts - Keyboard shortcuts: Bold - Crl + B, Italicize - Ctrl + I, Underline - Ctrl + U
Note: As a best-practice, we recommend never using the underline button to apply the underline style on any text. It makes users think it is a link, and from an ADA compliance perspective, it's misleading those with impaired vision. Likewise, the strikethrough button is also rarely used. Unless a special case, we suggest just removing the text that you intend to strike.
- How do I copy formatting applied to elements in the TEXT widget?
It is easy to copy the formatting that has been applied to elements in the WYSIWYG editor. All you have to do is select the element and click on the Copy Formatting tool (located in the second row.) Keyboard shortcut: Cmd + Shift + C - How do I clear all styles or formatting applied to elements in the TEXT widget?
It is easy to remove a formatting/styling that has been applied to elements in the WYSIWYG editor. All you have to do is select the element and click on the Remove Format tool (located in the second row.) - How do I create or remove a bulleted or a numbered list?
Select the text you want to be in a numbered or bulleted list and click the appropriate list tool (both are located in the second row). To remove a list, select the text and click the appropriate list tool.
To create a nested list, select the element(s) in the list that you would like to be nested. Then click on the Increase Indent button (located in the second row) - How do I indent a paragraph?
To indent a paragraph, select the paragraph and click on the Increase Indent tool (located in the second row) To remove an indent click, select the indented element and click on the Decrease Indent tool (located in the bottom row) - I want to change the alignment of the text, how do I do that?
To change the alignment of text, select the text you would like to change the alignment for and click on the Align (left, center, right, and justified) you would like (located in the second row.)
- How do I create a link?
While in the TEXT editor, select the text or photo you would like to be a link. Click the Link button (located in the second row) and if it is a URL, enter the website's URL in the URL field. If it is a file, select Browse Files and navigate to the proper directory followed by the folder where it is located. If the files need to be uploaded, you can do it here. If it is to another web page click the Browse Content button and navigate to the page you would like to link to, then click the plus sign to the right of it. Keyboard shortcut: Ctrl + L

- How do I add an anchor on my page?
Position the cursor where you want to place the anchor and click on the Anchor button (located in the second row). Name the anchor and click OK. A small red flag will be shown where the Anchor is located now. This is not visible to the public, only while you are editing the page. To link to the anchor, click on the Link button and switch the Link type to 'Link to anchor in the text'. Select the anchor in the 'By Anchor Name' drop-down menu from the options shown. - How do I place an image?
To place an image while in the TEXT editor, place the cursor where you would like the photo to go and click on the Image button (located in the second row.) Navigate to where the photo is stored by using the Browse button. If the photo hasn't been uploaded, you can upload it after navigating to the folder where it should be located.
After uploading or locating the photo you want to place, select it by either clicking on the plus sign to the right of the photo (which will bring in the photo at full size and non-optimized) or the size of the photo you would like to place. After selecting the photo, you will be taken back to the Image Properties window where we recommend entering Alternative Text (a description of that image) to maintain ADA compliance for that image.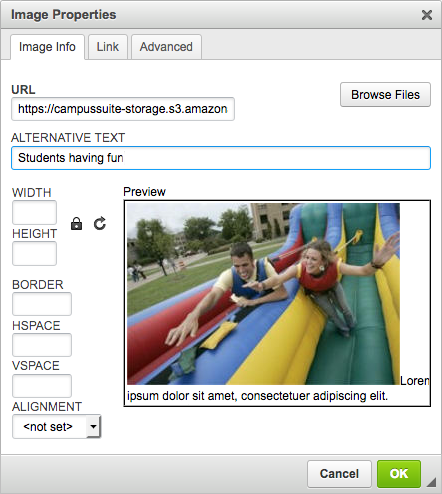
To align the photo use either 'Align Left' or 'Align Right' in the Styles menu and not the 'Alignment' field in Image Properties or the text alignment buttons located at the top of the toolbar. For more information, please see the Image Alignment article.
Note: It is important to avoid using the Image tool to place PDF files. PDFs are not compatible with the Image tool as they are not image files. Instead, they should be either linked to or placed on the page using the instructions provided in the following article: How can I make a PDF viewable on a page so it doesn't need to be downloaded? This will ensure proper functionality and display of PDF files on your website.
- How do I add a table to the page?
Click on the page where you would like the table to go followed by the Table button (located in the second row.) There, you will enter the number of rows & columns. If there should be headers at the top or left side of the table, these should be properly formatted to maintain ADA compliance (more info below). We recommend setting the width of all tables 100%.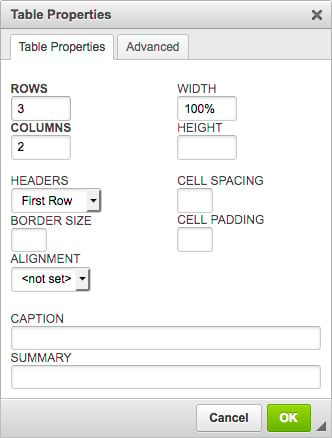
- How do I add a Horizontal line?
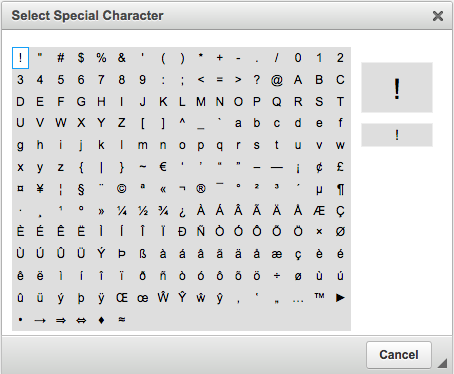
Place the cursor where you would like the line to be and click on the Insert Horizontal Line button (located in the second row.) - I would like to add a special character such as accented text, how do I do this?
You don't need to learn how to code to insert a special character. All you have to do is place the cursor where you would like to insert the special character and click on the Insert Special Character button (located in the second row) and select the special character.